

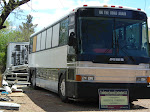
It's time to remove all the wiring. We'll start with the lower wires that went to th e comfort centers. These are held fast by rivets in insulated grommets. Drill out the rivets if you are going to re-use the grommets. If not, a wonder bar will pop them out and save a lot of time.
e comfort centers. These are held fast by rivets in insulated grommets. Drill out the rivets if you are going to re-use the grommets. If not, a wonder bar will pop them out and save a lot of time. Mind the wires that are tucked into the frame work. 

We were careful not to nick the wire so we could re-use it later.
We cut and capped the wires at the front where they came out of the wall leaving 6 to 12 inch pigtails. Fish them through the compartment
supports. Roll it up and set the bundle aside. 

Now remove the wires for the fluorescent lights.
There are a lot of connectors every 4'. Disconnect all of
the wires. These insulated grommets are the crimp style. Open with a small flat bar or flat head screw driver and then fish them through the compartment supports. The space is narrow so feed the wire with one hand and pull with the other. The connectors will hang up on everything so just be patient. We  again cut and capped the wires at the front where they came out of the wall leaving 6 to 12 inch pigtails. Roll it up and set the bundle aside.
We need to remove the fluorescent light lenses. You will find them nearest the windows and under the compartments. They run the length of the over head storage. With needle nose pliers, grab the rubber keeper strip and pull. This will release one side of the lens. The other side is held by a rubber compression gasket. Grab the
again cut and capped the wires at the front where they came out of the wall leaving 6 to 12 inch pigtails. Roll it up and set the bundle aside.
We need to remove the fluorescent light lenses. You will find them nearest the windows and under the compartments. They run the length of the over head storage. With needle nose pliers, grab the rubber keeper strip and pull. This will release one side of the lens. The other side is held by a rubber compression gasket. Grab the  lens firmly with both hands and pull it free. There is a lot of dust on the lens, so go slow.
 again cut and capped the wires at the front where they came out of the wall leaving 6 to 12 inch pigtails. Roll it up and set the bundle aside.
We need to remove the fluorescent light lenses. You will find them nearest the windows and under the compartments. They run the length of the over head storage. With needle nose pliers, grab the rubber keeper strip and pull. This will release one side of the lens. The other side is held by a rubber compression gasket. Grab the
again cut and capped the wires at the front where they came out of the wall leaving 6 to 12 inch pigtails. Roll it up and set the bundle aside.
We need to remove the fluorescent light lenses. You will find them nearest the windows and under the compartments. They run the length of the over head storage. With needle nose pliers, grab the rubber keeper strip and pull. This will release one side of the lens. The other side is held by a rubber compression gasket. Grab the  lens firmly with both hands and pull it free. There is a lot of dust on the lens, so go slow.
Once this is complete, you can remove the ballasts. There are two sitting side by side every 4'. Unscrew and pull them down. Cut the ground wire to free it.
Now you can cut the aluminum plate base that is riveted to the compartment frame work with a Saws-All. Use a bi-metal blade. Be careful of the blade grabbing at the end of the cut. Now you can cut the padded compartment frame work in 8' sections with the Saws-All using a  bi-metal blade. Start the cut about 3" away from the vertical supports to reduce blade vibration. Continue cutting thru the plastic under side, to and thru the rear frame.
It's time to remove the vertical supports. First, unfasten the nuts along the wall, then unscrew the supports on the ceiling freeing the 8' section. This will just fit out the door. Almost done.
bi-metal blade. Start the cut about 3" away from the vertical supports to reduce blade vibration. Continue cutting thru the plastic under side, to and thru the rear frame.
It's time to remove the vertical supports. First, unfasten the nuts along the wall, then unscrew the supports on the ceiling freeing the 8' section. This will just fit out the door. Almost done.
 bi-metal blade. Start the cut about 3" away from the vertical supports to reduce blade vibration. Continue cutting thru the plastic under side, to and thru the rear frame.
It's time to remove the vertical supports. First, unfasten the nuts along the wall, then unscrew the supports on the ceiling freeing the 8' section. This will just fit out the door. Almost done.
bi-metal blade. Start the cut about 3" away from the vertical supports to reduce blade vibration. Continue cutting thru the plastic under side, to and thru the rear frame.
It's time to remove the vertical supports. First, unfasten the nuts along the wall, then unscrew the supports on the ceiling freeing the 8' section. This will just fit out the door. Almost done.


All the Best,

Michael & Christi


No comments:
Post a Comment