THE BRIGHT SIDE
I was watching the news a couple of days ago as they were reporting a story on a tent city that has emerged in Sacramento. These are not the mentally ill or veterans suffering from PTSD or drug addicts or those we normally think of as homeless. The folks that have found themselves there were like many of us living paycheck to paycheck. But their paychecks had stopped. They are in a situation they never dreamed they'd be in and are making the best of it, while trying to find jobs. While I have had some extremely hard times, I have never
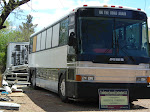
had to live in a tent. A feeling of gratitude came over me. I felt grateful that even when I have lost sleep over money problems, I have never been where they are. Close yes, but not quite there. I realized how lucky I am to have the opportunity to work with my husband, to build our bus. To know that we will never have to live in a tent. We understand that it could get really tough but we
will have a home. This has actually been a very comforting thought for me.
Growing up, I was lucky enough to be able to spend a lot of time with my grandparents. They, of course, lived during the Great Depression and were always very frugal. I learned alot from them about not being wasteful, something
our kids and grandkids may have not learned, had it not been for our country's current economic situation. I was also very lucky to have a mother who taught us to look on the bright side. Looking back I realize how hard that must have been for her. She was a single mom in the 70's. Wages for women sucked. My father didn't pay child support. Yet, we were
never on welfare. We never went hungry. We always had a roof over our heads. And Mom always had a positive attitude. I come from a line of strong, hard-working women and I am grateful for that. Yes, I give into that temptation to whine, but when it gets the best of me, I try to remember what those before me have been through and remind myself that they went through much more. I need to just put on my big girl panties and deal with it!
Living in this situation our country has found itself in, I choose to do as those before me and "look on the bright side" and know that all things happen for a reason. We have been living in a "throw away" society. Now, we have a big fat wake-up call. How will we handle our personal struggle with this? I think that the majority will stand up to the challenge. History is repeating itself. Those of us who learned from those who lived through this before need to teach those who have not had the experience.
So, fellow bus nuts, raise your glasses to our good fortune to have this opportunity to travel this great country of ours and remember to always, "look on the bright side." And if your having trouble seeing the bright side, move your bus for a better view!
All the Best, Michael & Christi
Please Comment Below


 Start Framing & Insulation
After walls are stripped it's time to affix 1"x 2" furring strips along the base of the side walls and about 1/4" below the window frames. I pre-drilled the base holes. A self tapping screw would not go through the sub-frame without pre-drilling. The self-tappers worked fine on the top run. We put a screw about every 2" or so.
Start Framing & Insulation
After walls are stripped it's time to affix 1"x 2" furring strips along the base of the side walls and about 1/4" below the window frames. I pre-drilled the base holes. A self tapping screw would not go through the sub-frame without pre-drilling. The self-tappers worked fine on the top run. We put a screw about every 2" or so.
 We bought 4' x 8' x 3/4" backed insulation. I measured every 8' to