 Start Framing & Insulation
After walls are stripped it's time to affix 1"x 2" furring strips along the base of the side walls and about 1/4" below the window frames. I pre-drilled the base holes. A self tapping screw would not go through the sub-frame without pre-drilling. The self-tappers worked fine on the top run. We put a screw about every 2" or so.

We bought 4' x 8' x 3/4" backed insulation. I measured every 8' to
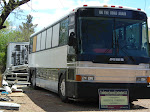
get a good fit. The MCI bus
seems to be shorter in the rear???

We used 3M spray adhesvie to hold the insulation in place and to keep it from squeaking later on. Spray the wall on the top, sides and bottom, then do the same to the foam. Wait 3 mins. and set in place.
Installing the beadboard. I may have jumped the gun on this one.
After putting half of it up, I stopped until we skin the windows.
I am using 1/4", 3 ply wood beadboard that comes in 4' x 8' sheets. Again, because the couch gets shorter to the rear, we took measurements every 4' starting in the rear. This amounted to a
1/2" gain every section. To cut down waste, I took the smallest measurement in each section and square cut the beadboard. I affixed the panels to the furring strips with PL200 construction glue and 1" brads. This made a small 1/2" to nothing gap along the bottom that I will cover with baseboard later. Walls next.
All the Best, Michael & Christi
Please Comment Below
 Start Framing & Insulation
After walls are stripped it's time to affix 1"x 2" furring strips along the base of the side walls and about 1/4" below the window frames. I pre-drilled the base holes. A self tapping screw would not go through the sub-frame without pre-drilling. The self-tappers worked fine on the top run. We put a screw about every 2" or so.
 We bought 4' x 8' x 3/4" backed insulation. I measured every 8' to get a good fit. The MCI bus
seems to be shorter in the rear???
 We used 3M spray adhesvie to hold the insulation in place and to keep it from squeaking later on. Spray the wall on the top, sides and bottom, then do the same to the foam. Wait 3 mins. and set in place.
Installing the beadboard. I may have jumped the gun on this one.
After putting half of it up, I stopped until we skin the windows.
I am using 1/4", 3 ply wood beadboard that comes in 4' x 8' sheets. Again, because the couch gets shorter to the rear, we took measurements every 4' starting in the rear. This amounted to a
1/2" gain every section. To cut down waste, I took the smallest measurement in each section and square cut the beadboard. I affixed the panels to the furring strips with PL200 construction glue and 1" brads. This made a small 1/2" to nothing gap along the bottom that I will cover with baseboard later. Walls next.
All the Best, Michael & Christi
Please Comment Below


No comments:
Post a Comment