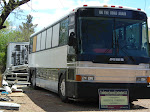
Buying Bus Conversion Insurance
What a pain in the B*TT! I have been asking other bus conversion buffs what they have done for insurance. It seems that one has to put their nose to the grindstone and call every insurance co. in the book to find one that offers full-coverage. Christi has been working on this one. Maybe I can get her to comment on it. Are buses a love/hate thing? I found this to be the best explanation on the web offered by Aon Recreation Insurance Co.
The world of insurance can sometimes be difficult to navigate-especially when the investment you wish to insure is something as tough to define as a bus conversion. Don't despair, specialty RV insurance providers are very familiar with the unique needs of bus conversion owners. Post-9/11, the insurance market has been experiencing rough times. Insurance companies have experienced big losses and, with the stock market down, do not have the investment dollars to make up for those losses. So, we're seeing insurance companies retreat to lines of coverage that are the most profitable and predictable for them.
How does this affect you, the bus conversion owner? You may see certain carriers choosing not to cover RVs or bus conversions anymore, or you may find that, as with most lines of insurance these days, small claims may result in a premium increase or even a loss of coverage. Also, in many cases, rates are increasing. With all these changes in the insurance industry, now's a good time to think about your coverage.
Where to Start
The first thing to know is there are two different ways to purchase insurance. You may either contact an insurance company directly or you can work with an insurance agent like us. There are a couple of disadvantages to dealing directly with an insurance company. First, it forces you to perform the feat of calling each company for their rates and coverage options to determine the best deal. As an agent, we do this work for you, checking with different insurance companies to find you the best rate and coverage for your vehicle.
Insurance companies also give agents like Aon Recreation Insurance special coverage features to offer customers. By contacting an insurance company directly, you may be inadvertently shorting yourself on valuable coverage. Additionally, if problems arise during the claim process, agents become your advocate in dealing with the insurance company. And, contrary to what some RVers believe, agencies do not charge more or add fees to insurance companies' rates.
School Bus Conversions
With underwriting guidelines being tightened to keep losses in check, insurance companies are avoiding certain types of risk. One of the most well-known risks that most specialty RV insurance providers avoid is the school bus conversion. Very few companies will insure this type of vehicle. The main reason cited for this is the axle of a school bus is generally a narrower axle than that of a regular bus. Thus, when the additional weight of the conversion is added, it can result in a top-heavy vehicle, which is more susceptible to rollover accidents. Historically, more serious accidents have occurred to school-bus conversions as compared to regular bus conversions-enough that many companies are no longer willing to accept this risk.
Older Bus Conversions
Buses come under additional scrutiny because so many conversions are done on older vehicles. If your bus is older than 20 years, you may be asked to have a mechanic inspect it. This confirms that the bus's systems are up-to-date and working safely.
Pre-Conversion Buses
Since many of you buy buses you plan to convert yourself, building value in the vehicle as the months go by, you may need to insure it for physical damage before it's converted. You'll certainly want to have liability insurance (to pay for the other party's injuries if you're at fault in an accident) when transporting the bus from the dealership or place of purchase to your home or workshop. Many times, too, you will need to drive the bus to the upholstery shop or to a mechanic during the conversion process.
Unfortunately, insurance companies do not offer temporary policies for RVs. You will need to purchase an insurance policy that lasts at least six months. You can get a liability-only policy, and the cost is generally minimal. If you opt for full coverage, a policy for a bus shell will generally have fewer features than a regular, fully-converted-bus policy. You will have less personal contents coverage and lower physical damage coverage because people usually don't carry as much stuff with them when they're in the middle of a conversion. For even a basic policy, most insurance companies requires the seats be removed and stipulate a period of time in which the conversion must be complete-typically a year-in order to continue providing coverage.
Appraisals
Once you find a policy you like, nearly all insurance companies will require an appraisal unless you are looking for a liability-only policy. The appraisal protects both you and the insurance company by establishing the value of the vehicle up front. It's in your best interest to have the vehicle professionally appraised so the insurance company knows what it's really worth. If you have a total loss and you didn't have an appraisal on record, it could be very difficult for the adjuster to ascertain what your vehicle was worth, since it was a one-of-a-kind custom coach.
With a basic Actual Cash Value policy, the appraised value will serve as a starting point for the adjuster if you experience a total loss. The adjuster will consider when the appraisal was done and factor in depreciation to arrive at a settlement amount. To fully protect your investment over time, check with your insurance provider to see if they offer Agreed Value Coverage. Agreed Value Coverage locks in the appraisal value, and that amount is what you're paid if you experience a total loss-with no deduction for depreciation. The appraisal will need to be updated every two to three years.
Your insurance provider should be able to refer you to a qualified appraiser or, in some cases, will allow you to do a complete evaluation of your own vehicle's condition. Your assessment can then be submitted to a valuation expert, who will search the market for comparable vehicles and, based on those and your vehicle assessment, place a value on your bus. This "self-evaluation" process allows you to have a hand in the appraisal, which makes sense because no one knows your bus better than you do.
Once you get your insurance, don't forget that keeping good records of any improvements, changes or additions will protect you in between appraisals. Additionally, you should let your insurance provider know when you make changes that alter the value of your vehicle. In a total loss, the adjuster will take your updates into consideration.
Bus conversions don't neatly fit into one vehicle category or another-unlike manufactured motorhomes-each one is unique. That doesn't mean you have to compromise on insurance. Specialty RV insurance providers have policies custom-made for your custom vehicle. When you purchase insurance, be sure you are working with a company that understands your lifestyle and your vehicle and has provided you with coverage that will amply cover your needs.
With nearly four decades of experience insuring bus conversions, no one understands your unique vehicle like Aon Recreation Insurance, The Recreation Insurance Specialist. Aon has multiple carrier options and can provide you with a policy custom-designed for the special nature of your vehicle.
Coverages may vary by state and company. Coverages are controlled by the policies issued and are not modified, extended or revised by the descriptions contained herein.
Information offered on the web by Aon Recreation Insurance Co.
All the Best, Michael & Christi
Please Comment Below

 This mostly consists of air shafts that run along the base of the side walls. Made of stainless steel ducting, it is rumored to be the resting place for all the lost small objects. Start in the front and remove all the screws (Philips) from the floor. Now the duct was built in sections. Remove the screws that connect each section. With a flat bar, lift the section, grab it and pull up and toward you. The top of the duct is only in a groove and will come free. Each section you remove is like a treasure hunt. Lots of coins, postcards, casino memorabilia, ballpoint pens, tokens and 2 ear
  rings (1 gold and 1 small diamond) Oh, and a lot of trash.
Lots of good stainless
steel to be salvaged here. On to the air defusers we just uncovered. These are made of aluminum and are riveted to the wall. Drill out or shear them off to remove the fixture. You will find one on each side.
OK, to the rear return air housing. these are also on both sides. These are again made of aluminum and are riveted to the wall. Drill
rings (1 gold and 1 small diamond) Oh, and a lot of trash.
Lots of good stainless
steel to be salvaged here. On to the air defusers we just uncovered. These are made of aluminum and are riveted to the wall. Drill out or shear them off to remove the fixture. You will find one on each side.
OK, to the rear return air housing. these are also on both sides. These are again made of aluminum and are riveted to the wall. Drill  out or shear them off to remove the fixture. You will find
more stuff in the duct in the floor. Next the ramp.
out or shear them off to remove the fixture. You will find
more stuff in the duct in the floor. Next the ramp.


 Removal of the Over Head Storage Compartments. Part 3


 e comfort centers. These are held fast by rivets in insulated grommets. Drill out the rivets if you are going to re-use the grommets. If not, a wonder bar will pop them out and save a lot of time.


 Remove the nuts and the bench seat will be free to move.
Stand each of them on end and they will fit through the door.
The rear seats are removed by lifting the seat cushions, then lift the 3 back cushions straight up as a unit. Gravity holds them in place on simple hooks.
Remove the nuts and the bench seat will be free to move.
Stand each of them on end and they will fit through the door.
The rear seats are removed by lifting the seat cushions, then lift the 3 back cushions straight up as a unit. Gravity holds them in place on simple hooks.


 Please Comment Below