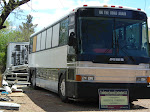
Down the shoah
1 week ago

 I was going to wait on the roof air for a week or so But, I took Christi on a "show off" drive and she said that the air had to be next. So I said to myself, Why don't I install the roof air next! And I did.


 Here is the Batt. bank and inverter that I have yet to hook up. Still reading on this one.


 Another view.
 More plumbing
 A little table to travel with.
 Christi still caulking and painting.
 So many things to do and we are running out of time. The house is sold, more like, passed on. Down to 1 car. 1 more trip left to the thrift store. 1 to the recycling center. Yard sales are over. Conversion inspection on Weds. Mean while, the plumber is plumbing, we are trimming, painting, fabricating, wiring, installing,
  tiling, flooring and well, you get
 the picture. There is a lot that we know how to do and we are finding that there is a lot we don't know. But on the bright side, we are learning more with every passing day. Oh, the passing day thing, we are down to just 8 days before "Shake Down". Things are coming along well. I would like to have a little more done like the roof airs. But, all in all things are well. A good thing is we have a 30 day shake
  down. The whole month of June to tweak Mrs. Jones. We
  will need it.
 All the Best, Michael & Christi
See our other Blog;http://michaelhargisshow.blogspot.com/
All the Best, Michael & Christi
See our other Blog;http://michaelhargisshow.blogspot.com/
 Well, the back splash was 1st. Dad (Randy Smith) came over to help with Mrs. Jones. I cut the 1/4 inch hardi-board just before he got here. Don't want him sitting around drinking coffee all day! LOL. While Dad worked on the back splash I put up the light fixture and a cabinet in the bathroom. Christi and I
  talked about flooring last night. We had picked up some laminate flooring for a real good price a few months ago, but when I went to install it in the salon, it would not lock together. It was to go in the kitchen also. No joy on that! So we do have extra tile from our friend George. We only need a little Hardi-board, glue, screws, mastic and some labor. Oh, Dad! Christi ran to the box store for supplies and Dad and I used up what material we had and started to tile the kitchen. Christi also said she would like one of those counter tops that fit over one sink so she could have more usable counter space. So, I made a
  cardboard template of the sink opening then rough cut the piece of
  counter top I cut out for the sink. Dad pulled out his router and cut a seat in it then cleaned the edge up with a rasp and belt sander. Good Job Dad!!! Then Dad said, "Can't we put that flooring in the bedroom if we screw it down, its better than nothing!" OK, we can give it a try. Hey, What do you know?
  It worked. It's not permanent but it will do for now. Christi arrived with more supplies and made us lunch. Bonus!
  We ate and got back to work. We finished the bedroom floor and then put the rest of the Hardi-board in the kitchen and cleaned up. Good day Dad, Thanks.

 Note: Yesterday I piddled around as Christi painted and stained. I just wanted to finish up some almost done projects. So, I installed the 50amp Genny plug, cut and set the closet poles, ground off rivets and screw tips, nailed off the interior wall coverings and drilled the rest of the holes for the plumber to name a few. I have to say that sometimes during a project like this, some days seem like nothing gets done even though you worked hard all day. Just sit back and look at the whole picture. Every little thing you do brings you closer to your goal. Your Dream. I can see mine now, How about you?


 Today Mrs. Jones got the rest of her wall coverings courtesy of Jeff, some more paint by Christi, and I, 2 lights and plumbing prep; hang the valve board, affix the water pump and drill the holes for the waste pipes and water supply lines.
  Christi started sanding the pantry doors and prowls the bus. Now we are off to the Home Depot to get the h2o heater and other supplies. Our son, Jared wants to take Mom out to eat. The plumber may come by and start on the lines. I'll cross my fingers
 .
. Happy Mothers Day to all of you.

 All the Best, Michael & Christi
See our other Blog;http://michaelhargisshow.blogspot.com/
All the Best, Michael & Christi
See our other Blog;http://michaelhargisshow.blogspot.com/ For some reason, I did not want to do this. Putting a hole in the roof is just wrong. I put it off as long as I could. Momma want a bathroom and a kitchen sink. I used a 2.1/4inch all purpose hole saw and a drill motor. I cut a hole in the 2x4 plate and then carefully cut through the aluminum ceiling. I stopped to inspect for wires and sure enough, their they were. A whole bundle of them. I moved them out of the way and drilled a pilot hole through the roof in the center of the hole. I climbed up on the roof with all the tools and supplies I need to complete to task at hand. Using the same hole saw, I cut through the roof. Wheew! Not as bad as I thought it would be.
  Using a 50 year silicone caulk and 1/2 inch self tapping screws, I applied the flashing to the roof. I will paint it white later so it will blend. I then cut the ABS vent pipe at a slant and put it through the flashing boot with the slant facing the rear. I read that on someones web page. A small piece of P-tape and 2 screws held the pipe in place. I'm glad that is over with!
 First, place the toilet in the area you want to mount it. Draw an outline of it on the floor. Then look to see that the area is clear of any supports or obstructions under the floor. Then check to see if you have a straight line from the toilet to the black water holding tank.
 Drill a pilot hole into the floor and re-check. The toilet requires a minimin of a 3-inch waste pipe. Using a 3-1/2 inch hole saw and a strong drill motor, cut your hole. We found this used toilet at the
  local thrift store. Now we will prep for the tile by decking the floor with 1/2 inch hardiboard. This will be glued with PL400 construction adhesive and screwed in place. We are ready for tile.
All the Best, Michael & Christi
See our other Blog; http://michaelhargisshow.blogspot.com/
local thrift store. Now we will prep for the tile by decking the floor with 1/2 inch hardiboard. This will be glued with PL400 construction adhesive and screwed in place. We are ready for tile.
All the Best, Michael & Christi
See our other Blog; http://michaelhargisshow.blogspot.com/
 I removed the door, handles, the "I'm in here" light and the seat cover. I took a piece of sheet aluminum salvaged from the upper storage compartments. This sheet will be caulked over the hole. The tank is clean but we will put in a small amount of bleach and rinse. Now, Christi can design her walk-in closet. Honey has closet, will travel.
 We picked a single handle, anti-scald, Moen fixture. It has a nice clean look and is easy to install. Just follow the instructions and you will do fine. If you are not comfortable with plumbing, call a plumber. You don't want this to leak. You will have to rip the wall out to fix it. Not fun! I used 1/2 inch PVC, because we had it. Short runs don't expand and contract like long runs. The long runs, 8' or more, tend to pull apart when using the recommended primer and clear glue. Mostly on the hot water supply line. I found that you can use PVC pipe for both hot and cold supply lines if you use the purple primer and the dark purple HOT glue and let dry for 48 hours. Now, that's for short runs only. Less than 7'. I ran the lines down through the wall plate and floor into the storage compartment. I left them long and will cut them to suit later. Next, plumb the toilet.

 First. check that there are no supports or cables under were you will be cutting the drain and supply lines. We framed for a 3' x 3' deep well shower and YES, I had to move it over 1 1/2 inches due to a cable! Placed the pan and marked the drain. Moved the pan and cut a 3" hole for the 2" drain pipe. Install the brass drain to the pan, then set the pan.
 We will be tiling the walls so we affix Dura-rock to the walls up to the ceiling. Set the regulator and shower head. Ready for tile.