About Us, Michael & Christi Hargis

My photo
Tucson/Tombstone, AZ, United States
WE are Retired, Entertainers PLEASE ADD a COMMENT or just say HI. You can click on any of the photos to enlarge them.
Showing posts with label MCI. Show all posts

Tuesday, April 21, 2009

Re: Can you remove the A/C frame work on a MCI 102A3 with a 8V92????

This is a ? we posted on the "MAK Publishing Bus and Coach Conversions Bulletin Board" We removed the compressor and rocking mount in the rear of the bus. Now we have the 2 supports (frames) that is welded to the side wall and the main frame that supports the 8V92. Her is the link; http://www.busconversions.com/bbs/index.php?topic=11690.0 I found a good use of this space without cutting a thing.
All the Best, Michael & Christi See our other Blog;http://michaelhargisshow.blogspot.com/

Thursday, April 2, 2009

The "Must Have Tool Kit" for a bus (michael)

I was on the the MAK bus conversion site on-line, Chating and we starting talking about tools. I realized I didn't have a clue as to what should be in a bus tool box. So this AM I posted the question and bam! The respounces started coming in and still coming. So I will up-date this post as needed. Here is the question; What is your "Must have" Over The Road Tool Kit? We are converting our 1987 MCI 102A3 and would like to know what tools you would have on board? We will be on tour for aprox. 2 years+. And where do you stow them? PIC"S PLEASE. We will be making a list. The LIST:Coach-Net road service and a high-limit Visa card. Everything else is optional.Sean Two full sets of combination wrenches from 3/8 to 1-1/4. 1/4, 3/8 & 1/2" socket sets in English 3/8" drive metric sockets, 50' of air hose with tire chucks and a blow nozzle, Multimeter, wiring pliers, side cutters, vice grips, water pump, pliers, needle nose pliers, forceps, Drawer full of screwdrivers from jewellers' to really big, Hot glue gun, soldering kits, hammers, 3/8 cordless drill & a complete drill index, 3/4" drive socket set, 1" impact with tire sockets to fit the bus, 1" breaker bar with a 4 foot snipe, 2 x 20 ton bottle jacks, a variety of C-clamps, staple gun, caulking gun, electronic leak detector, Cat 5 cable tester, 2 really big (like 14") Crescent wrenches, Oil and fuel filter wrenches, 2 1/2 gallon yellow diesel can, filled, crimper and a selection of crimp-on electrical terminals, 5-tool combo kits, (the kit came with a drill, sabre saw, reciprocating saw, mini circular saw, chain saw, and flashlight, right-angle drill, Jack stands & cribbing, big channel locks, A/C guages, Magnifying glass, dremel tool, bullseye glass repair kits, hacksaw, butane torch, step ladder, those little stretchy numbers with the round ball on the end (?), And as we discussed last night, that most versatile tool of all --- the IR thermometer, utility knife, hammer, handheld grinder, heat gun, 5 foot folding ladder also stows under a bunk bed inside, I carry a parts drawer set of various lamps ( marker, turn sig etc), peumatic connectors, Tee's, valves, of various sizes,DOT tubing, 6 amp 12V battery charger, Don't forget the duck tape! (DreamscapeEagle) LOL, up-dates to come. Now I know what to get the bus for X-Mass. All the Best, Michael & Christi See our other Blog;http://michaelhargisshow.blogspot.com/

Sunday, March 15, 2009

The Best of Both Worlds (michael)

The Best of both Worlds. I have been in the RV Community since 1994. My 1st RV was a 1973 Kayot 22/24 class A. What a piece of..... I loved that old wreak. It was my ticket to freedom. Through the years I up graded. A nice Terry travel trailer. Then to a Bounder and the last one was a class A Gulf Stream. I bought a membership and went to all pot lucks, outings and Mexican train get togethers. I have always dreamed of owning a bus. A real bus. But buses are for the rich. Right! They would never except people like us into their world. Not we are bad people, we are quite good acutely. But the bus people live on lakes and golf courses.Right? Now, we are still the same people only now we own a bus. a nice bus. A MCI Tour bus and we are getting to know the bus people. We are finding out that the bus people and the RV people are the same people. They are helpful, friendly and kind. Turns out, we have always been a part of this great big family. Who knew? "Honey? were gonna need another happy hour".
All the Best, Michael & Christi Please Comment Below

Saturday, March 14, 2009

A Thank You to Mr. Trevor Hall (michael)

A Thank You to Mr. Trevor Hall. Christi & I would like to thank Mr. Trevor Hall for all his help with our life changing MCI Bus adventure. He sold us this great bus. He sent us an e-mail. Trevor wrote "Hey Mike and Christi! I just checked out your blog and you guys are making great progress! You will be on the road in no time! And at least you got all the "no fun" stuff out of the way, now its on to the fun "clean" work. Well, I just wanted to drop you guys a line and say hello. Hope all is well! Keep up the good work!-Trevor". Thank you for believing in us and helping to make our wish come true.
All the Best, Michael & Christi Please Comment Below

Wednesday, March 11, 2009

Start Framing & Insulation (michael)

Start Framing & Insulation After walls are stripped it's time to affix 1"x 2" furring strips along the base of the side walls and about 1/4" below the window frames. I pre-drilled the base holes. A self tapping screw would not go through the sub-frame without pre-drilling. The self-tappers worked fine on the top run. We put a screw about every 2" or so.
We bought 4' x 8' x 3/4" backed insulation. I measured every 8' to
get a good fit. The MCI bus
seems to be shorter in the rear???
We used 3M spray adhesvie to hold the insulation in place and to keep it from squeaking later on. Spray the wall on the top, sides and bottom, then do the same to the foam. Wait 3 mins. and set in place. Installing the beadboard. I may have jumped the gun on this one.
After putting half of it up, I stopped until we skin the windows.
I am using 1/4", 3 ply wood beadboard that comes in 4' x 8' sheets. Again, because the couch gets shorter to the rear, we took measurements every 4' starting in the rear. This amounted to a
1/2" gain every section. To cut down waste, I took the smallest measurement in each section and square cut the beadboard. I affixed the panels to the furring strips with PL200 construction glue and 1" brads. This made a small 1/2" to nothing gap along the bottom that I will cover with baseboard later. Walls next. All the Best, Michael & Christi Please Comment Below

Friday, March 6, 2009

Other Stuff (michael)

Other Stuff Stuff is a cunning beast. Just when you think you have gotten rid of the dead weight, it changes it's tactics. Oh yes, the Thrift Store still sings our praises as we arrive for our weekly deposit. Bags and boxes are carted inside while my hard fisted, eagle eyed wife stands guard like an Amazon warrior (a dream of mine) at the SUV making sure the beast doesn't sneak back into our realm. But then the oddest thing occurred. Other Stuff started showing up. Our friends began bringing Stuff. Good Stuff. They see a large MCI in our driveway as they follow the small town rumors to our door step. They give a courteous "hello", slow down and say "Hi" or start an idle conversation to get a peek inside. "Oooos" and "aaahhhs". We tell them our conversion plans and how much there is to do. Then, as if we asked them to volunteer to vanquish a rabid wolf, they vanish! I did say odd things were happening. An hour or perhaps, a day goes by and they come back with Stuff. Good Stuff. Each time they arrive with this Stuff, Christi stands with wonderment in her eyes. "Hey, this is good Stuff". We are getting water tanks, both fresh and gray, tile for the bathroom and kitchen, a power converter, an RV toilet, a gas generator and lots more and it keeps coming. Good Stuff. Great Stuff! Today, Christi went to the computer and started making a list of all the good Stuff. She showed me the Stuff list. "Look, look at all this Wonderful Stuff", she says. Can you see what has happened? The Beast! The Beast has changed into a cute, cuddly, little have to have it. My Amazon warrior has been hood winked. And I must say that I too have fallen back under the Stuff Spell. The sleepless dream of swimming in Stuff. I love Stuff, but we must keep our heads. Now it has to be the right Stuff. The Stuff that will help us get on the road again. The Stuff that dreams are made of. All the Best, Michael & Christi Please Comment Below

Thursday, March 5, 2009

Removel of the Int. Side Panels (michael)

Removal of the Int. Side Panels I had a idea. Let's save some work and leave the side panels in place. We can insulate and cover them over. But the wall chair support has to go which also supports the panels. So I got some self-tapping screws and set them at the bottom of the lateral supports. With a 1/2 inch drive drill motor I removed the large Phillps head screws and........... BANG. The whole unit hit the floor. LOL, so much for saving time. Back to the old addage"if you do it right the 1st time...". On the bright side, we have more salvage. Now I have to remove all the self-tapping screws. Once I got it cleaned up, I found a nice clean wall we can properly insulate and cover with bead board. Also, the panel spacers are held in place with a sealant and come right off. I can't wait, I have to do some framing.
All the Best, Michael & Christi Please Comment Below

Wednesday, March 4, 2009

About our MCI Bus (michael)

About our MCI Bus
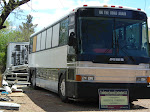
MCI 102A3 Bus 1985 - 1992 Advantages - great value, high quality, designed for 30 years/3 million miles, sub-frame/engine area 90% stainless steel/aluminum, easy to find parts, after market parts and body upgrade kits availableDisadvantages - popularity increases priceNotes - 102A3 means 102" side with 3 axles, heavier than the 102A2, only the passenger section of the bus was widened, with front windshield and assembly remaining 96-inches wide, body widens at an angle from the drive backwardsConversion Issues - good for all conversionsSpecifications - Length: 40 feet, Width: 102 inches, Height: 133 inches, Wheelbase: 285 inches, Turn radius: 44 feet, Typical Engines: DDA 8V-71, DDA 6V-92TA, DDA 8V-92TA, Seating: 43-49, Luggage: 319 cubic feet, Aisle width: 14 inches, Front door width: 24 inches
What more could one wish for and have it come true?
All the Best, Michael & Christi Please Comment Below

Removal of the ramp (michael)

Removal of the ramp Everything on this rig is built like a tank, even the ramp. 1st we need to clean the crud out of the screw heads. Lots of dirt crammed in them. I used a knife blade to break it up then blew it out. Remove the large Phillips screws then the small screws along the front sides. Then take your trusty flat bar and work it under the edge of the ramp to pry it up. When it pops loose, place a wedge under it so you can grip it with hands and lift it up and out of the floor. Do not step into the void as the plywood decking is only 1/4 inch thick and you may go through it. You will find more trash and coins here. Mmm, treasure! This ramp is stout, I'll have to find a good use for it. Mmm, salvage. Tomorrow, we frame in the void. Honey, get me the hammer and saw. We're Building, Baby!
All the Best, Michael & Christi Please Comment Below

Removal of the upper Air Vent System (michael)

Removal of the Upper Air Vent System This mostly consists of air shafts that run along the base of the side walls. Made of stainless steel ducting, it is rumored to be the resting place for all the lost small objects. Start in the front and remove all the screws (Philips) from the floor. Now the duct was built in sections. Remove the screws that connect each section. With a flat bar, lift the section, grab it and pull up and toward you. The top of the duct is only in a groove and will come free. Each section you remove is like a treasure hunt. Lots of coins, postcards, casino memorabilia, ballpoint pens, tokens and 2 ear rings (1 gold and 1 small diamond) Oh, and a lot of trash. Lots of good stainless steel to be salvaged here. On to the air defusers we just uncovered. These are made of aluminum and are riveted to the wall. Drill out or shear them off to remove the fixture. You will find one on each side. OK, to the rear return air housing. these are also on both sides. These are again made of aluminum and are riveted to the wall. Drill out or shear them off to remove the fixture. You will find more stuff in the duct in the floor. Next the ramp.

All the Best, Michael & Christi Please Comment Below

Monday, March 2, 2009

Removal of the Over Head Storage Compartments. Part 3 (michael)

Removal of the Over Head Storage Compartments. Part 3
The last thing to do is remove the horizontal supports on the walls and ceiling. 1st along the wall. There is the main heavy aluminum rail that is affixed with Star screws. The ballast aluminum plate base is riveted to it and is supporting both the black aluminum shield, attached by 2 Philips head screws and the lite aluminum bottom rail that is held by rivets.
In approx. the middle of the supports, you will find a connection point for all 3 components. You can separate the rails here to make for more manageable pieces. Go ahead and drill out or shear off the 2 rivets, then remove the 2 screws from the shield. Then un-do the heavy aluminum junction plate from the main heavy aluminum rail. Now remove the star screws, grab one end and wiggle the rail off the wall. The components are a little long and should be fed out a window but can fit out the door. Once outside, you can disassemble the components for salvage. We will be re-using a lot of this.
Well, after that, the ceiling support is
a breeze. Unscrew the heavy aluminum junction plate in the middle of the rail. Unbolt the rail, grab one end and wiggle the rail off the ceiling. That's it. We will deal with the wires later, just make sure they are all capped.
Note the bin over the driver's seat. We'll leave it there for maps and such. Our new place is getting larger by the day and I can't wait to get on the road again!
All the Best, Michael & Christi Please Comment Below

Sunday, March 1, 2009

Removal of the Over Head Storage Compartments. Part 2

Removal of the Over Head Storage Compartments. Part 2
It's time to remove all the wiring. We'll start with the lower wires that went to the comfort centers. These are held fast by rivets in insulated grommets. Drill out the rivets if you are going to re-use the grommets. If not, a wonder bar will pop them out and save a lot of time.
Mind the wires that are tucked into the frame work.
We were careful not to nick the wire so we could re-use it later.
We cut and capped the wires at the front where they came out of the wall leaving 6 to 12 inch pigtails. Fish them through the compartment supports. Roll it up and set the bundle aside.
Now remove the wires for the fluorescent lights.
There are a lot of connectors every 4'. Disconnect all of the wires. These insulated grommets are the crimp style. Open with a small flat bar or flat head screw driver and then fish them through the compartment supports. The space is narrow so feed the wire with one hand and pull with the other. The connectors will hang up on everything so just be patient. We again cut and capped the wires at the front where they came out of the wall leaving 6 to 12 inch pigtails. Roll it up and set the bundle aside. We need to remove the fluorescent light lenses. You will find them nearest the windows and under the compartments. They run the length of the over head storage. With needle nose pliers, grab the rubber keeper strip and pull. This will release one side of the lens. The other side is held by a rubber compression gasket. Grab the lens firmly with both hands and pull it free. There is a lot of dust on the lens, so go slow.
Once this is complete, you can remove the ballasts. There are two sitting side by side every 4'. Unscrew and pull them down. Cut the ground wire to free it.
Now you can cut the aluminum plate base that is riveted to the compartment frame work with a Saws-All. Use a bi-metal blade. Be careful of the blade grabbing at the end of the cut. Now you can cut the padded compartment frame work in 8' sections with the Saws-All using a bi-metal blade. Start the cut about 3" away from the vertical supports to reduce blade vibration. Continue cutting thru the plastic under side, to and thru the rear frame. It's time to remove the vertical supports. First, unfasten the nuts along the wall, then unscrew the supports on the ceiling freeing the 8' section. This will just fit out the door. Almost done.
All the Best,
Michael & Christi
Please Comment Below

Christi's Virgin Blog (christi)

Christi's Virgin Blog So, I've finally decided to sit myself down and give this a go. So, please be gentle in the comment section. :) I've been waiting for the right time to add my input to this blogging thing. As I was drying my hair this morning, (a mindless mundane chore that allows my thoughts to wander), I was going over Michael's last couple of blogs. I realized that now that the rig is here, a lot of his writing will be interesting only to those who are nuts enough (our soulmates), to take on this type of project. While it may be a learning experience or guideline for some, for others...BORING!! Much like Michael's favorite TV shows. You know, The History, Science and NASA channels, or, are you ready?... THE RESEARCH CHANNEL, (can't they make this stuff more exciting?). Ok, so I have a short attention span. Anyway, back to the task at hand. Right now Michael is taking out all the overhead compartments, which seem to be built to hold Tammy Faye's cosmetic case instead of the average person's carry-on luggage. This job requires taking out every screw, nut and bolt, one at a time. Too tedious for me! My idea of demolition requires a crow bar sledge hammer and a Saws-All. MMMM, love those power tools! But then he is a much more patient soul than I. I look forward to the part where we get to start putting in flooring, walls, replacing windows, etc. Now that's excitement! Ok, so I probably could use a little help in the excitement department, too. Now that the bus is finally here, I find myself wanting to say, "Is it done yet? Can we go now?" Alas, there's sooooooo much to do before we can go anywhere, and not just readying the bus. It's a bit overwhelming. But I'll save that for next time. Oh, Honey! Where's that sledge hammer?? All the Best, Michael & Christi Please Comment Below

Saturday, February 28, 2009

Removal of the MCI Over Head Storage compartments. Part 1 (michael)

Removal of the Over Head Storage Compartments. Part 1 At first, this looks pretty cut and dry. But as I look closer, I can see that these compartments are constructed very well with a lot of components and one heck of a lot of screws. OK, step by step. 1st, turn the master battery switch off. Remove the doors by unbolting the gas struts. Then using a Philips head screw motor, remove the screws from the hinge and the door will come off. The door latch has 4 Philips head screws to remove it. I removed all the components in an assembly line style, ie; all the struts, all the doors, and so on. It goes faster that way. Now remove the Comfort stations. Remove the 4 Philips head screws and it will hang down by the light and speaker wires. Take them apart at the wire disconnects. These components have good parts that can be re-used. The lights we will use as reading and accent lights throughout the bus along with the switches. I don't know what to do with the speakers. Next, remove the door hinge base and light cover. Remove the 4 Philips head screws and the mount will swing out to you. Lift it straight up and it will come free. Be careful of the 3' fluorescent bulb under the cover. Then remove the bulbs and put them in a safe place. You can salvage the stainless door hinges by drilling out the rivets. Then remove the very back padded panel by 6 Philips head screws. Take a flat pry bar to the middle front edge to pop it loose. Now remover the bottom padded cover held by 6 Philips head screws and silicone caulk. You will have to push from the bottom in order to free this panel. Now remove the side panels with a Philips screw driver. You will find 4' fluorescent bulbs in the back of the compartment. Remove the bulbs and put them in a safe place. There is a lot of aluminum to be salvaged for re-use or recycle in these compartments. Here is the result of my Saturday. I spent the day creating this pile of stuff that is as long as the bus. This is the end of Part 1. I will be back at it today, (Sunday). There is still a lot to do. All the Best, Michael & Christi Please Comment Below